A concrete driveway not only gives you vehicle a dry, flat place to park your vehicle, it also enhances both the look and the value of the property. In many newer neighbourhoods there are covenants in place to ensure that all properties install driveways made from concrete rather than asphalt or gravel.
Not so long ago concrete driveways were all off-white slabs that were easily stained and/or cracked during years of service. Today's driveways can be installed in an endless array of decorative patterns such painted or stamped concrete. Another popular driveway is a aggregate pad that features the natural colouring of the small rocks in the mix.
The big knock against concrete driveways is that they are expensive compared to the alternative, solid surfaces. However, if you are bit handy and can follow directions you can save hundreds of dollars by setting up the project yourself.
1. Planning Your Driveway
Many homeowners that replace their driveways already have the area in place and so getting another survey or contacting the regional building inspector may not be necessary. However, the authorities should be consulted before proceeding. In addition, make you know where all the utility lines and sewer lines are buried before beginning the excavation. If you home is an older one you might consider changing these lines after the old driveway has been taken away as they might be ending their useful life.
Other things to consider:
• Changing the path: You may want to alter the design and have a circular driveway or adjust the new on so that you have a better line of sight for traffic on the street.
• Drainage: Design the new driveway so that water will run off into a suitable drainage system and not be directed into the garage or home. This may also be a good time to re-design the drain tile system.
• Curb Appeal: Have the slope and contour of the drive set up to increase the beauty of the property.
2. Cost Estimate
Concrete is expensive to buy, mix and transport so before ordering up a ready-mix vehicle make sure your measurements are correct and allow for extra.
• Forms: In many instances scrap wood can be issued for forms but allow for the purchase of wood to surround the pad.
• Reinforcement: With Canada's freeze-thaw cycle a heavy-gauge (6" X 6"), reinforcing mesh should be purchased to cover 90% of the pad, just shy of the edges.
• Excavation and Removal of Waste: The old pad has to be broken up and carted away. This should be done by hiring a company with a truck unless the old concrete is to be buried on the property or used as reinforcement for the new pad. In addition, an excavating machine can take out large rocks that may interfere with the new pad and cause cracking.
• Fill: To form a bed you'll need Class "A" gravel so allow for at least a one-foot depth below the pad.
• Compacting Machine: A compacting machine should be rented for at least a full day.
• Concrete: Allow for at least a four-inch bed with thicker wings to avoid cracking.
• Concrete Saw: This will be used to cut frost lines in the concrete to allow for the expansion and contraction stresses.
3. Preparation
• After the old pad have been removed and the excavation complete the site should be cleared and squared off. Allow for the one-foot of compacted fill.
• The compactor will help with the leveling and the gravel should come within an inch of ground level.
• Next the area should be staked out to build the forms with one-foot pieces of squared timber such as two-by-twos.
• Run string approximately four inches above the gravel base as a guide to install the forms.
• Forms should be screwed on the stakes on the inside
• Backfill the forms to reinforce them against the pressure of the concrete.
• Lay in the reinforcement mesh and prop the pieces off the grade with two-inch rocks so that concrete can flow in under it.
4. Concrete
• Make sure that the concrete company can get the truck directly to the pad. This will save wheel-barrowing in the concrete, which is messy and requires extra hands. The drive will help spread the concrete by moving the spout back-and-forth and moving the truck.
• Using an old, steel rake spread out the concrete evenly on the pad. Note* The best footwear is a pair of gumboots. The concrete should go to the top of the forms.
• Trowel the concrete smoothly, moving backward.
• Finishing can be done with an edging trowel and a special brown can be used to give texture to the surface.
A Job for Pros
Unless you've participated in a few concrete pouring sessions it is always best to get the professionals involved. Concrete is too expensive to waste and a poor driveway is a lasting monument. In other words, mistakes are very costly.
For a concrete professional in your area consult our Contractor Directory or simply post your project online.
Posted by: Kim KinradeSuggested Reading For You

Cracks In the Basement Concrete Floor
Cracks in the basement may arise from various factors, such as foundation settling, soil shifts, w...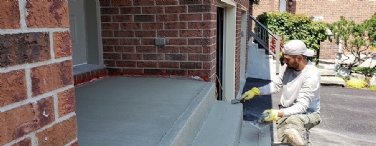
Best of TrustedPros 2019 | Spotlight: Ottawa Parging Group
The team at Ottawa Parging Group has won the Best of TrustedPros for 2019. Their commitment to quality works m...