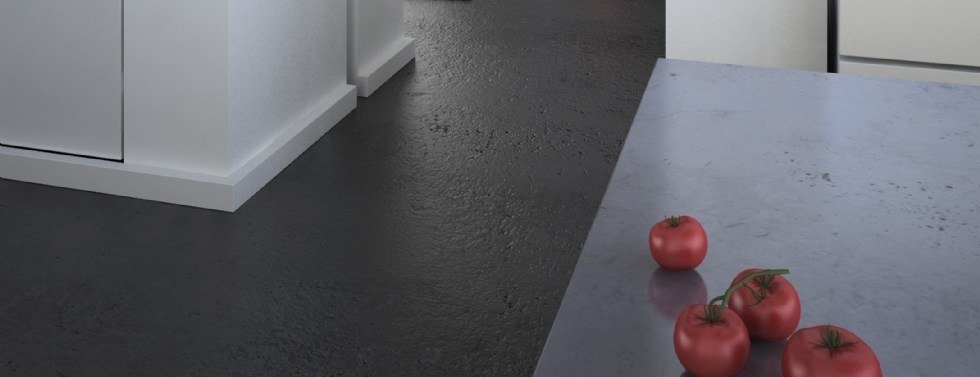
During the past decade the art of decorative concrete has found its way from the patio and into the kitchen in the form of concrete countertops.
Concrete counter surfaces are usually a two-inch thick slab of concrete that sits on the kitchen or bathroom cabinets just like most solid countertop products. However, this is where the similarity ends. With decorative concrete dyes and other additives can be added to personalize the surface and make it match almost any decor.
The process takes many times longer than a traditional countertop installation because the concrete has to be mixed and cast inside a wooden die. Then there is the curing process that can take a few days. However, at the end of the process is a rich, one-of-a-kind countertop that will have no equals, because no two countertops are ever alike. In addition, for the handy homeowner, concrete countertops can be a do-it-yourself project.
1. First the Forms
The first step in building a concrete countertop is designing and building a form that exactly matches your contertop measurement. Depending upon what shape the countertop will be standard 3/4-in-thick plywood coated with melamine paint is used for making the frame.
This covering is non-absorbent and this helps the concrete cure slower to give it greater strength. The concrete edges remain smooth and this prevents particles from sticking during the removal of the form. For assembling the form regular drywall screws or a powered stapler can be used. Careful planning should go into making allowances for a sink hole, range top and faucets.
These are usually made from blocks that are coated with melamine and placed in the mould. These blocks are made to be the same height as the forms so that the concrete can rise to the top evenly.
2. Add Strength
Concrete sidewalk require reinforcing and concrete countertops do too. They are usually strengthened with reinforcing rods, polypropylene fibers and diamond lathe. For added strength around the sinks No. 3 (3/8-in.) rebar or reinforcing track should be used. This will counter the weight of a sink full of water or other stressors.
3. The Concrete Process
The usual mixture for concrete is two quarts of white Portland cement added to each 60-pound bag of concrete. Strength and longevity of the concrete countertop is directly dependant upon the way it is mixed.
To begin with the dry ingredients - cement, solid dyes, aggregates - are mixed separately from the liquids. A mason's hoe is best for this. The liquids - liquid pigment, latex and water - are mixed next and then added slowly to the dry ingredients while a power mixer makes sure of the consistency. If the concrete is being mixed in stages and poured in layers the mixing process should ongoing so that the consistency stays the same.
4. Two Concrete Mixes
Just like finishing off a sidewalk a separate mix is needed for concrete countertop finishing. For strength and to make up the bulk of the counter a poly-fiber-reinforced concrete is used. Then a standard concrete finishing mix is used to finish it off and for an inch thick border around the edges that will be exposed. The surface is then made up of a thick layer of finishing concrete.
6. Keeping the Consistency
Since two different batches are melded together to form the countertop they have to be bonded together to form a solid block. To achieve this the colour and consistency have to continue through the slab. The slump of the concrete should be just wet enough to form into a ball. A soupy mixture cannot not be compacted and excess water will float to the surface and spoil the finish.
7. Spreading the Mix
While each layer is poured the concrete mix is tamped down with a magnesium float to pack it tightly into the forms. The surface is smoothed with the float to smooth out any dye or aggregate clumps.
8. The Finishing Process
Voids caused by air bubbles are now filled with small amounts of finishing concrete. Large pieces of aggregate should be taken out and the holes filled and tamped with concrete. In a motion similar to concrete finishing the surface should be striked, or sawed, with a piece of square metal channel eighteen-inches longer than the form is wide. This bar is moved back and forth in a saw motion along the top of the form.
9. Concrete Curing
The setting time for concrete is around two hours and then the surface is smoothed with a steel trowel. Small puddles of water can occur on the slab's surface. If this happens the slab should be left for a half-an-hour whereby the process is repeated. In fact, for best results, trowel the slab in three to four smaller sessions.
In addition the concrete should be covered with wet burlap or a plastic covering to slow down the curing process. This will increase the hardness of the surface. When the concrete has cured for at least 48 hours the forms can be removed.
10. Placement
The countertop is heavy so three to four persons should handle it to get it into place. It s then buffed to a shine and then sealed with a coat of acrylic clear finish. Finally the sink and other appliances are put into place.
For more information on decorative concrete countertops search our Contractor Directory for a contractor or simply post your project online.
Posted by: Kim KinradeSuggested Reading For You

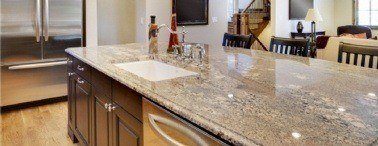
Picking the Right Countertop - Granite, Marble, or Concrete
Picking countertop is important not just for the aesthetics of the kitchen, but also in regards to functio...
Engineered Stone Kitchen Counter Tops
Engineered stone kitchen counter tops are becoming very popular today due to their incredible strength, re...