Following in the footsteps of linoleum and wall-to-wall carpet, laminate flooring has revolutionized the way people look at their floors. Not only are laminate floors beautiful and durable they are great do-it-yourself projects, ones that can be completed within the span of a weekend by novices.
The Anatomy of Laminate Floors
Laminate flooring is manufactured from recycled wood products to look like natural products such as plank wood flooring, tile and stone. These synthetic floor planks originated in Europe where wood-filled products are very popular. This is because few western European countries have their own forestry industries and importing solid wood is a very expensive proposition.
Recycled wood particles are compressed into a plank onto which a photograph of a design, either wood-grain or natural stone, is applied. The key to the hardness of the flooring is the application of a layer of melamine plastic film over the design. This gives the floor plank the durability to withstand constant traffic.
The bottom of the compressed plank is treated with a waterproofing seal to prevent moisture from compromising the plank from below and causing swelling. Laminate flooring comes in different thicknesses, from between 8 and 12 millimeters, and the rule-of-thumb is that the thicker planks are more durable. In addition, unlike most hardwoods, laminates are quite dent-resistant.
Cost of Installation
In almost all cases installing laminate flooring is less expensive than wood, tile or natural stone flooring. In addition, installing laminate flooring is a great do-it-yourself project. Like wood flooring, the construction of laminate flooring provides a monolithic sheet. However, unlike wood flooring material, laminate flooring snaps together without the need of glue, staples, nails, or other adhesives.
Once installed, laminate floors are only held down at the edges, secured with quarter-round stripping nailed to the floors moldings. The floor "floats" over the sub-floor on a cushion of foam, laminate floor underlayment that also provides sound-proofing.
The cost of laminate flooring, including the flooring, foam underlay and quarter-round, ranges from as little as $1.00 to $2.50 a square foot. Getting professional to lay it down ranges from $1.50 to $3.00 a square foot. So even the most expensive job, at $5.50 a square foot, is less than half the price of installed wood or natural stone.
Do-It-Yourself
1. Planning Before beginning your project, plan to start in a small room to get the hang of the project. Measure the space and add 10% for mistakes. Since laminate flooring is sold in boxes if there are any full boxes left over they can be returned.
2. Choose the Flooring Not only should you choose the design but also the thickness. If the room is a high-traffic area it is best to use a thicker laminate flooring. Some cheap laminate flooring can have their design worn down by steady traffic so make sure you have a good quality flooring for this part of the house. For a spare bedroom or storage room you don't have to break the bank on quality. Make sure you get foam padding and quarter-round as well as vapor seal tape and finishing nails.
3. Laminate Flooring Tools Your home improvement store will have kits for laminate floor including a small pry bar, spacers and a bumper for tapping in the planks to get them tight. You will also need a rubber mallet. A powered, miter saw is the best for cutting the planks when the end of the wall is reached. Also, to stagger the flooring the second, fourth and sixth rows (and so on) have to be started with a half-plank. Otherwise the seams will line up and the floor will not be strong. If you have a small table saw this is great for length cuts when the far wall is reached. In addition, a jigsaw is handy for cutting around door moldings and pipes.
4. Prepare the Floor If there is carpet, remove it and make sure that the surface is free of nails or other obstructions. If the floor is concrete you will have to roll down vapor seal first and seal the joints with red, vapor seal tape to prevent moisture from getting through. Once the foam is laid down and sealed, cut the edges with a carpet knife so that it does not bunch up along the walls.
5. Starting Out Pick one corner of the room where the walls are square and free of obstacles. In other words, don't start on the side that has a door or a closet. Get used to laying the plank before having to make tricky cuts. Cut the planks in half for the second row and snap that onto a full plank. Place this down in the corner and now you have the start of the first two rows. Make sure you have 1/4" spaces between the walls and the floor for expansion. There are special spacers for that. Snap two more full planks in place on each row and then start the third one. With three rows started the floor will begin to have some heft and won't slide around when you get going. It wouldn't hurt to tape the edges of the floor just to make sure.
6. Obstacles Planks can be shaped for door moldings by cutting them to shape with a jigsaw. However, take the approach that tile installers use and cut the molding ¼" up from the floor. This can be done with a crosscut saw. Then the plank just slides underneath without having to cut tricky angles. For pipes, you will have to use a keyhole saw or jigsaw.
7. Finishing The last row will probably be too wide so the planks can be cut lengthwise with a crosscut saw or a table saw. Make sure that the whole floor is at least ¼" away from the wall before securing it. Then nail the quarter-round to the floor moldings. Use the miter saw to cut 45 degree angles in the corners.
If you don't want to do it yourself you can consult our Contractor Directory, or place your project online and flooring contractors will contact you.
Posted by: TrustedProsSuggested Reading For You

Best of TrustedPros 2019 | Spotlight: SB Construction
The team at SB Construction has won the Best of TrustedPros for 2019. Their commitment to quality works means ...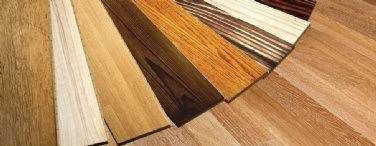
Final Considerations for Your Perfect Hardwood Flooring Fit
After finally deciding on hardwood as your desired flooring material, remember: there are still so man...