Laying tile floors can be difficult enough, but for someone new to DIY home improvement projects, tiling walls can be even harder. You can hire contractors to install your tiled wall, but if you're on a budget, the following tips can help you complete the daunting task yourself. Be warned; this is an advanced skill, but by doing the work yourself, you can really save a lot of money on a custom bathroom or kitchen.
Choosing the Tile Material
Your first step when installing wall tile is to choose a material. There are a number of possible materials, so here are some tips for picking ones that make sense for you:
- Stick to tiles that are specifically made for walls. Here's where a salesperson from your local home supply store can help you if the tiles aren't labeled clearly. Tiles made for floors only are often too heavy to work on walls.
- Stay away from glass if you want to do the work yourself. Glass tiles are extremely hard to successful install, and even a contractor with experience installing tiles shouldn't attempt it unless he/she has special training.
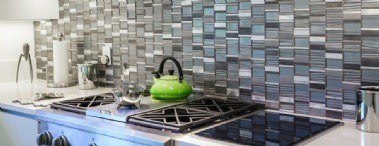
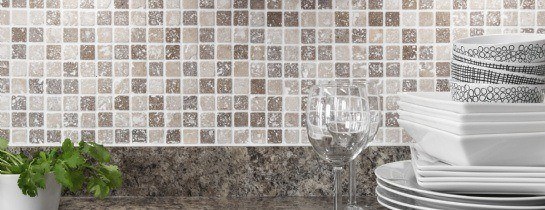
- Go for ceramic for the best results. Ceramic tiles are durable, inexpensive, and come in hundreds of colors and designs. They're the easiest for a non-professional to install on walls in most cases.
Prep Work
Without the right tools and supplies, your end job will suffer. Here are some tips for perfect prepping:
- Purchase safety equipment. Even professionals should use goggles and gloves. Also make sure you fully read the instruction on any of the tools you borrow for the jump (such as a glass cutter), and take a training course if possible.
- Make sure the walls are clean and completely dry. You should scrape off extra paint and remove wallpaper. If the walls are glossy, sand them. Cement board is the best surface for installing tile, so you may want to install this surface first. Some tiles do fine on drywall, though. Again, read the tile instructions.
- Patch any holes before you install tile. Yes, no one will see holes underneath the tile, but this could lead to problems with the tile sticking and staying level. It could also lead to moisture issues in the future.
Tile Design
Once you begin to install tile, there's no turning back. So, use the following tips to determine your design before you start:
- Lay out the tiles on the floor before you start. That way, you can play with your options to see what you like best.
- Stick to a tile pattern that is fairly easy. The two most common are jack-on-jack and running bond. A jack-on-jack design, which is the easiest, is simply rows of tiles, one on top of another. A running bond pattern looks like a brick wall - rows that are offset so that they are staggered.
- Play with colors and designs. Don't be afraid to move away from a single color and play with designs. You can sprinkle in colored or patterned tiles if you don't want the entire wall to be bold, or you can consider a border with the tiles. If you've installed tile in the past, you might even want to consider a mosaic!
Installation
The hardest part of installing tile is starting laying them on the wall, ensuring that they are square and level. Here are some tips for ensuring that the end result is beautiful:
- Most walls in most homes aren't perfect. That can make it hard for you to lay tile in a straight line. Don't start at one end of the wall or at the floor - instead find the center of the wall (approximately) and start there. Use a level tool to create a reference line, and follow it.
- Attach a level piece of wood below your initial guideline so that you're creating a straight row. This will also keep the tile from sliding down the wall.
- Use spacers - they'll help you create straight grout lines. Many ceramic tiles come with built-in spacers, which saves you a step. Don't forget to remove the spacer before you begin to grout.
Grouting and Finishing
Laying the tile is not the only step - you also need to grout and, in some cases, seal or finish the work you've done. These tips can help you complete your tiling project:
- Use the right grout for your tiles. It should be a thick pasty consistency when you mix it. Read and follow the package instructions.
- Along with grout, you need caulking. Where the tile meets the bathtub or counter, you should use a silicone caulking to fill the seam.
- Wait for the grout to dry before applying a sealer. Even when it feels dry to the touch or looks dry, it might not be completely ready. Usually, this takes at least a week. If you don't seal, the grout could become discolored.
Maintenance
Lastly, don't forget to research proper maintenance with your tile walls. In some cases, you need to re-seal the walls every few years, and some tiles can't be cleaned with certain bathroom products. You will spend hours - days - creating the perfect tiled wall. Keep it that way with a little TLC!
Need help with your kitchen or bathroom remodeling project? Post your project at TrustedPros.ca and receive free estimates from top-rated local remodeling experts or search our Contractor Directory.
Posted by: TrustedProsSuggested Reading For You
Best of TrustedPros 2019 | Spotlight: Coco Tile Flooring
The team at Coco Tile Flooring has won the Best of TrustedPros for 2019. Their commitment to quality works mea...
Best of TrustedPros 2019 | Spotlight: Tile By Style
The team at Tile By Style has won the Best of TrustedPros for 2019. Their commitment to quality works means th...