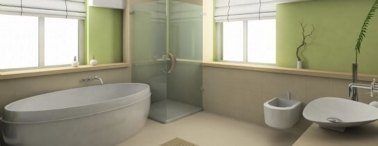
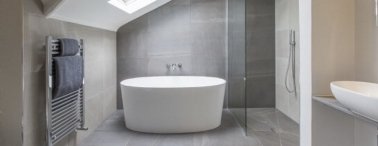
Tiles create a luxurious look in any bathroom and help to reduce maintenance needs. If your bathroom renovation includes shower tiles, flooring tiles or any other type of tiling, consider these design and installation tips to ensure a slick, smooth look. Choosing the Right Tile Take a look in your building materials store to check out tiles of various sizes, shapes and colors. From tinted ceramic tiles to natural stone with distinct graining and glossy marble styles, you'll be amazed at the vast selection available. Think about a few things while choosing your tiles:
- Appearance - what color of tiling do you envision in your new bathroom? And how does the shape fit in with the balance of your room? Subway tiles work very well in minimalistic designs, while traditional 12-inch square tiles come in a variety of types to suit bathrooms from traditional to contemporary.
- Texture - this has more to do with the feel of the tile, as opposed to the look. Shower tiles need to be comfortable to the touch, since you'll be standing on them and frequently touching the walls. Also think about how water moves on different textures and consider safety factors when designing tile floors. You do not want to opt for a style that will present a slippery surface when wet.
- Grout - although most people think of the tile color and graining when looking at a tiled bathroom, grout plays a major role in the finish. Will you opt for a matching color or choose something contrasting? Will the grout be smooth and hardly noticeable or extend the texture of the tile? Also remember to invest in a high quality product to ensure maximum durability.
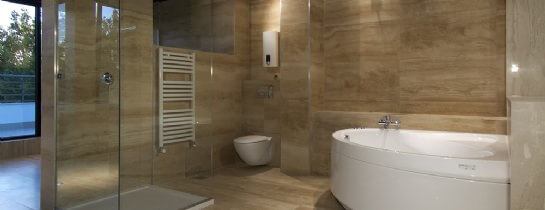
Design Tip # 1 - Plan Very Carefully The old adage to measure twice and cut once is especially important when designing a tiled bathroom. First, be sure of tile size by bringing home samples of your chosen tile. Use the samples to physically mark out the location of your tiles, directly onto the plywood backing or by using a large sheet of trace paper. Cutting tile is difficult and should be minimized whenever possible. Look at the structure behind the wall during the planning stage. Ask your plumber and electrician for detailed drawings (unless they've completed their work) and plan to have the tile support framed and installed before you need to lay out the tiles. Design Tip # 2 - Start at the Top When laying tiles against the wall, start from the ceiling down. This ensures a more linear appearance and a smoother fit, no matter what type of tile you're using. DIY tiling can be challenging, especially for those without experience, but starting at the top of your walls will make the process easier. If your contractor is looking after the project, they will take care of this design factor. But you still need to be aware that partial or cut tiles will line the bottom of the wall. This is much less noticeable than at the ceiling line. Also, make a point of asking your tile installer to blend the tiles and mix up the grain, creating a more attractive overall appearance. Try to purchase tiles from the same lot to avoid noticeable color differences. But when that's not possible, be sure to blend the lots well and ensure your top line (against the ceiling) includes a good mixture. Design Tip # 3 - Continuous Corners Corners are another detail too often overlooked in tile designs. Wrapped tiles give your corners a more finished, attractive look by using the same tile and actually wrapping it around the corner. Cut and precisely placed, this provides a continuous grain and appealing color. Wrapped corners make the room look larger and highlight the beauty of a full tile. It takes an experienced installer to wrap tiles. Cutting and laying tiles in this precise manner requires years of practice and skill, but paying for that expertise is well worth it. Make sure your contractor is prepared to wrap corners and try to choose a tile that will work with the corners already in place around your bathroom. Design Tip # 4 - Niches Are Nice Why invest in bathroom renovations if you're not able to improve the function of your space? Incorporate niches in your tiled walls and showers to enhance storage and add convenience. Niches can be long and narrow, tall and wide or any combination of depth, length and width that suits your purpose. Some families create a niche for each person, making it easy to separate bathing products and linens, while others build niches for recessed medicine cabinets or to display art work. Design is entirely up to you, but niches add a touch of class and improve the function of this all-important room. Remember to frame your niches a touch larger than the final size. Experts agree that adding one or two inches to the finished dimensions will leave sufficient room for most grouted tiles. Also, making a niche smaller is a straightforward task, while expanding an existing niche requires extensive removal and renovation. Design Tip # 5 - Enhance Drains Wherever Possible You'll need to decide on a type of drain and have a plumber install it before laying your tile. Most drains must be set and left alone, meaning your tiles will need to fit snugly around the drain to avoid leaks. Make sure that grout lines flow through a linear drain, as opposed to running parallel. This allows the drain to blend into the tiling. Consider choosing a drain that suits your tile color or shape for better visual flow, and always have tiled floors and shower lips installed at a slight pitch to redirect water back into the shower drain. Tiles are the perfect addition to your bathroom renovation and increase the value of your home when installed well. Make sure to choose your tiles wisely and take your time designing the layout. Hire an expert installer if possible. If you plan to tackle DIY tiling, read up as much as you can about the process beforehand. A beautiful job creates a beautiful bathroom that will be comfortable and easy to keep clean.
Want to replace those old, worn bathroom tiles with some spanking new tiles? Why not post your project or ask your question and receive prompt responses from trusted profesionals?
Posted by: TrustedProsSuggested Reading For You
DIY Bathroom Renovations
Today, tax credits may not be available, so anything that is being added will need to come out of your...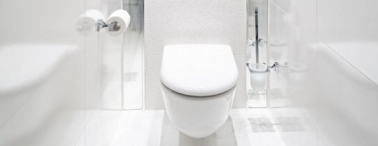
Cool Toilets That Flush the Old Toilets Away
There is one thing all of us humans have in common. It doesn't matter where you live, how much money y...