The idea of painting a concrete floor is very alluring, but it is not a decision to be taken lightly. The surface must be properly prepared. If you decide to paint your basement, bear in mind that the project will create a huge surface area by which fumes will spread throughout the house via the heating and cooling system. If you have any sensitive family members, you might want to have them stay in a hotel while the paint is curing.
Once you paint a concrete floor, you are committed to its maintenance forever. This is why preparation and proper choice of coating is so important. If you cover the floor improperly, you are in for ongoing nightmare of peeling paint battles. This is not a mix-together-some-leftover-paint project. You want to go to a store with the experts who can help you pick out the best paint and materials for the job.
The whole point to the project is to create a low-maintenance situation, so spending more money on the best materials and the extra time spent on preparation time is well worth it.
Tools and Materials
- Masking Tape
- Shop Vacuum cleaner
- TSP (Tri Sodium Phosphate) available at home stores
- Mop Bucket
- Mop
- Broom
- Dustpan
- Etching compound or Muriatic acid (for oil-based paint) or Phosphoric acid (for latex paint)
- Concrete paint
- Roller
- Roller extension
- Brushes recommended by paint experts at the paint store or home store
- Paint trays
- Cloths
- Concrete sealer
- Concrete patch
- Concrete primer (for unpainted floors)
- Knee pads or kneeling pad
- Paint scraper
Step 1 - Clearing Room
Clear the whole floor, or move everything to one side of the floor.
Step 2 - Cleaning Surface
Ideally, it is best to vacuum floor with a shop vacuum, but you can also use the extensions of a household vacuum. If there is a lot of heavy debris, you may want to give the floor a quick sweep of the debris.
If there is any old paint, you want to now scrape it with a paint scraper. Knee pads or garden kneeling pad is recommended for this.
Repeat sweeping and vacuuming procedure.
Step 3 - Patching
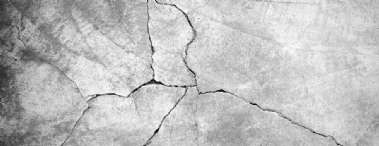
Next, you want to patch any cracks or holes in the concrete. Be sure each area you are patching are free of any loose gravel or dirt.
Step 4 - Washing
Wash away grease or oil with TSP and hot water. Be sure to follow the directions on the box very carefully. Next, rinse the floor thoroughly with hot water.
Step 4 - Etching the Concrete
Just as many surfaces need to be sanded before painted, if the floor has never been etched before, it must be etched with etching solution recommended by the paint manufacturer. After letting the floor thoroughly dry, suck up any etching dust with a vacuum.
Step 5 - Sealing
Seal the concrete with a type of cement sealer recommended by the paint manufacturer. Again, read the directions carefully and allow plenty of drying time.
Step 6 - Prime Coating
Now you are ready to paint. Use primer recommended by manufacturer. Some concrete coatings combine primer and finish paint together. In that case use the first coat of paint as the prime coat.
Tape off the bottom of the walls with masking tape. Next, paint around the entire edge of floor, creating enough of a width so we don't have to roll too close to the wall with the roller.
Now paint the middle of the floor in sections, starting farthest away from the floor exit area, and then close in toward the exit. Come up with a plan to remove all equipment at the end of the job and to paint that last little piece of floor by the exit.
Step 7 - Top Coats
Now apply the top coats, using the directions in Step 7. Apply two medium coats.
Step 8 - Final Sealer
After the last top has thoroughly dried, you can add one coat of sealer to help the paint last longer. If you are painting a garage, you may want to place some runner where car tires will track. The heat from the tires can lift the paint.
Although you can paint the concrete floor yourself, but its best to get it done by a professional contractor. Visit TrustedPros.ca for our list of professionals to help you in your task.
Posted by: TrustedPros


