
Benefits of a Laminated Floor

Ever popular hardwood flooring has a competitor; laminated flooring has grabbed the attention of homeowners for several reasons. Appearance, durability, ease of maintenance, and cost are all very persuasive factors for homeowners considering a laminated floor installation:
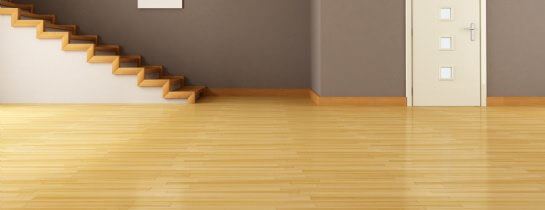
- Appearance - like hardwood floor options, laminated wood floor is available in a wide variety of simulated wood types and colors. New technology allows for laminated wood flooring that rivals or exceeds real hardwood in attractiveness.
- Durability - laminate hardwood floor is manufactured in a process using melamine resins and aluminum oxide; bonded with high heat and extreme pressure. This process results in a finished surface that is much harder and durable than actual wood. Laminated floor surfaces are highly resistant to moisture, staining, and fading. Many manufacturers offer 10 to 25 year warranties.
- Ease of Maintenance - caring for laminated flooring is as easy as dry mopping or wiping with a damp cloth.
- Cost - laminated hardwood floor costs range from about $7 to $11 per square foot, installed. A basic hardwood floor runs about $10 to $13 per square foot; more for exotic choices and styles.
Hardwood Flooring or Laminate?
Other deciding factors may come into play when a homeowner is considering hardwood vs. laminate flooring:
- Installation - traditional hardwood floor installation is a rather labor-intensive complicated process, as it is nailed into place with a special nailing tool. Nails are driven at an angle into the groove side; getting the starter run properly installed can be tricky. Some substrates are not suitable for hardwood; such as concrete or particle board. On the other hand, laminate hardwood flooring “floats†on the substrate. Traditional laminate is assembled by snapping tongue and groove strips together using a small amount of glue in the groove. New innovations in laminate flooring are glueless; strips simply snap together.
- Finish - traditional unfinished hardwood flooring requires sanding, staining, and 5 to 7 applications of finish, such as polyurethane. Laminated hardwood flooring is pre-finished; ready for use at installation.
- Re-finishing - depending on volume of traffic, hardwood floor refinishing is necessary to restore luster and shine periodically; a lengthy time-consuming process. One further complicated when hardwood floor staining necessitates sanding to remove the stain. Not so with laminate flooring.
- Maintenance - traditional hardwood floor maintenance or hardwood floor cleaning involves extra care to help preserve the finish. Laminate flooring only requires wiping with a damp cloth; best done frequently to avoid scratching and dulling from particulate soils.
New Hardwood/Laminate Blends
New innovations in laminate / hardwood flooring integrate a top layer of actual hardwood onto a laminate core. Installed either as a glued floating installation or glueless snap-together. Since the top layer is actual hardwood, the finish is not as durable as melamine resin/aluminum oxide laminates. And cost can be considerable; especially for exotics.
How to Install Laminated Floor in Your Home
Proper preparation is the first step to successful installation of any floor covering; beginning with accurate measurements to determine the amount of flooring material required. For the average laminate flooring installation, allow at least 10% extra for unusable waste. Laminate comes in 3 to 8-inch widths, with a standard length of 48-inches; some waste is unavoidable.
Normal laminate installation has boards running the length of a room. However, some people prefer to have the boards parallel with outside light entering the room, such as through a large picture window.
Be sure to bring laminate flooring into the house at least 48-hours before installation. This allows the material to acclimate to the temperature and humidity inside the home; helping to prevent shifting after installation.
Consider purchasing an installation kit, available at most retail outlets where laminate flooring is sold. A tapping block for assembling boards, pry tools, and spacers will prove invaluable during the installation process. Kits run about $20.
Floor Preparation
Prepare the area for installation by removing baseboards, moldings, and doors. Check door jambs to see if the thickness of the laminate flooring will necessitate undercutting the jamb. Place a board on a scrap of underlay foam; if it fits easily under the door jamb, no adjustment will be required.
Prepare floor surface by removing carpet (if applicable); make sure the surface is relatively level. It may be necessary to sand excessive high spots (such as on a joist), or fill low spots with leveling compound. Remove any nails, staples, or tacks protruding from floorboards; make sure the surface is clean and free from loose debris.
Floor Underlayment
Install the underlayment by rolling it out on the floor; edges should be butted together, but not overlapped. For concrete, include a layer of plastic sheeting as a vapor barrier first. Be sure to use the proper underlayment for either glued laminate installation or glueless. Underlayment is thinner for glued; thicker and softer for glueless.
Floor Installation
Depending on which way you decide to run the planks, measure from the wall where the first run will begin to the wall where the last will end. And then determine if you will need to rip the first plank lengthwise. If possible, try to end with about the same width plank in the last run.
Lay the first row of planks with groove side against the starting wall; if it is necessary to rip planks, cut off the groove side. Use a ¼-inch spacer to insure proper spacing from the wall.
The runs of planking should be done in threes. Proper spacing is accomplished by starting the first run with a full length plank. Begin the second run with a plank cut to 2/3 of its full length; the third run using a plank 1/3 of its full length.
When cutting laminate, use a circular saw with a fine blade, or a jigsaw. Always cut with the finish side down. This helps insure a good clean cut with no tear out.
Finish each run with full planks; use cut to fit planks at the end of each run. Repeat this sequence in subsequent runs; make sure no joints are less than 8-inches from each other; from one run to the other.
Assembling the boards is the same for both glued and glueless installations, with the exception of a small amount of special glue in the groove before assembly. Insert the tongue edge into the groove at an angle, and then press down; the edges will snap together.
Insure planks are locked together by tapping them using a special block and hammer for that purpose. Always use the block to avoid damage incurred by striking directly on the plank with the hammer.
Use the special pry tools from the installation kit when working close to the wall; this will help bull planks into place end to end. Again, apply the hammer to the tool and not the laminate.
After all floor planking is laid, replace baseboard and molding; take precautions not to nail through the laminate flooring. The baseboard should cover the ¼-inch gap around the room perimeter.
DIY Laminate Floor Installation or Floor Contractor Services?
Floating floor installation is a relatively easy project for the DIY homeowner. However, if it sounds complicated or you simply don't have the time, hiring a flooring contractor may be a good option.
An experienced interior flooring contractor or professional floor covering contractor can usually install an entire room of glueless laminated flooring in a single afternoon.
Whether installing laminated floor or traditional hardwood flooring, an excellent resource to find a reliable local hardwood floor contractor is at TrustedPros.ca
Homeowners sign up and post their flooring project free - with no obligation whatsoever. Then sit back, relax, and let the bids come rolling in.
Receive competitive bids from contractors in your area, ready to provide quick professional installation for your favorite type laminated or hardwood flooring.
To sign up and post your project, visit TrustedPros.ca
Posted by: TrustedPros

