Vinyl siding is an attractive and economical choice for your exterior wall finish. On your shed, garage or your house itself, vinyl siding is durable and comes in a wide variety of colors and styles. Made of PVC (polyvinyl chloride), this type of siding is a great value and will be trouble free for decades.
Hiring a siding contractor is always recommended but vinyl siding can also be a good DIY project to take on. This isn't a job to go into unprepared though or you'll end up with noisy, faulty, ugly siding that doesn't perform up to par.
Make sure your DIY vinyl siding project will be smooth and the completed handiwork will be something you can be proud of.
1) Get How To Instructions From the Right Source
Not all vinyl siding lines are created equal, so go to the source of yours for the best advice. Check out the website for the manufacturer of your vinyl siding and look for installation brochures, booklets and pamphlets.
They should include detailed diagrams and step by step, specific instructions on putting up the product that you have bought.
2) Find a Partner or Two
DIY vinyl siding is not a solo job. Since the pieces are generally 12 feet long, you'll need another set of hands at the opposite end even when moving the siding. It also helps to have a third person to hold, snap, nail and do other generally helpful jobs.
3) Choose Your Timing and Watch the Weather
As with many outdoor jobs, the weather will be a big factor in the success of your DIY vinyl siding project. If it's too windy, the materials will be difficult to handle and likely end up all over your yard. Vinyl is fairly light and can be easily picked up and blown away.
Rain is not a big deal as the product is moisture proof, but you should always make sure the ladder or any other platforms you're climbing on are safe and not slippery.
Extreme heat is another climate condition to avoid. Not only will it be uncomfortable for you and your friends, but the vinyl will actually become softer and bend easily in your hands. It's not going to damage the product necessarily, but you may find it harder to get a tight fit.
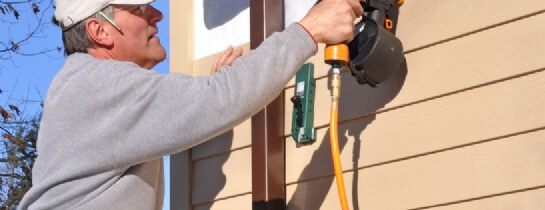
4) Keep the Fasteners Close, But Not Too Close
Vinyl siding is nailed into your exterior wall. There should be nail slots in the siding pieces for easy reference. If not then use a nail punch to create one, don't nail straight through the vinyl or you'll risk damage.
Homeowners often complain that their vinyl siding is noisy or rattles in the wind. The most likely culprit for this problem is faulty installation. The siding pieces need to be nailed down tightly, within 1/16 - 1/32†of the siding flange. If you nail tight to the vinyl, the material will have problems during expansion and contraction. Also stay in the center of the nail slot to allow for movement.
If your vinyl siding is currently rattling away, a repair can be done by unlocking the siding pieces until you find the loose one (or two, or three). Hammer in the nails and lock the pieces back in.
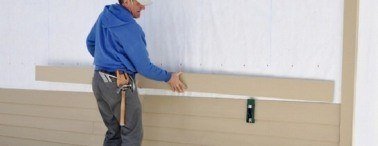
5) Keep It Loose
When you snap the vinyl siding pieces in place, don't butt them tight. When locked they can simply hang loose. As you're installing the siding, check that the pieces are level after every five or six rows. Once you get in a groove installation will run much smoother, but keep checking throughout.
The house, shed or other building will look fabulous when your DIY vinyl siding project is complete. Now you can look forward to a maintenance-free, durable and beautiful exterior finish. Just don't forget to thank the friends that helped you out.
Posted by: TrustedProsSuggested Reading For You

Siding For Canadian Weather
There is a huge variety of siding products on the market. Siding is supposed to protect your home frame and ho...
Home Improvement With Low Maintenance Exterior Siding
Modern technology has provided todays homeowners with choices for low maintenance exterior siding. This articl...