History of Drywall
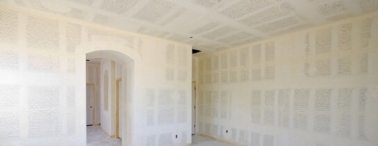
World War II brought urgency to the building process. Ships, planes and guns were made quickly and efficiently and this also spread to the building industry. Pre-built trusses and ready-mix concrete were arriving on job sites and so was a new interior panel called gypsum board or Sheet Rock.
This product was made by inserting a liquid mash of gypsum, ash and other ingredients in between two sheets of smooth, heavy paper to form a board that could be nailed to the interior studs of homes. The joints and nail heads were taped with paper and smoothed over to form one continuous wall.
Although not as durable as plaster it cut down the time for finishing off the interior of a home by 80%. In addition it could be installed by crews who did not have spend years learning the trade. They could be fully trained in a matter of weeks.
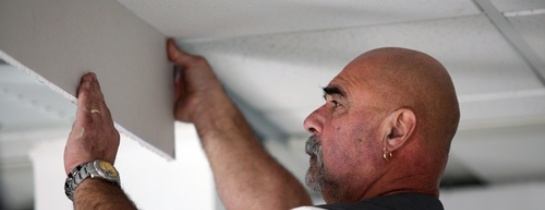
Installing Drywall
Drywall contractors have come a long way since the product became fashionable. Drywall installation has evolved its own set of tools and fasteners including stilts to enable the installer to reach the ceiling and portable scaffolding with risers to lift the sheets to the ceiling. These evolutions allow for a quicker job and this affects the drywall installation cost.
Learning how to drywall on your own is okay if you have lots of time and a relatively small job, but professionals have the tools. However, for those without special tools the sheets can be raised to a standard eight-foot ceiling with T-bars. These are made from an eight-foot piece of 2' X 4' stud with a four foot piece screwed horizontally on the top to form a T.
Start with the ceiling first. Before raising the sheet it is marked as a reference for the studs because once in place it will be hard to pin-point them. While the helper uses the T-bar to raise his end the installer climbs a step-ladder holding his end above his head. Once the sheet is against the studs the installer places drywall screws in the studs and then moves toward the helper to tack in a few more.
With a half dozen screws in place the sheet can now hang on its own and the installer will go back over the job and place screws in every hole. For walls, like the ceiling, the job starts at the corners. Since not all framers are alike, the centers of the studs may not be always 16 so it is much easier to lay the sheets horizontally and cut off the ends. Start at the ceiling. In most applications two sheets of four-foot width each will reach to the ceiling. If the height is slightly less than eight feet the bottom length can be cut off.
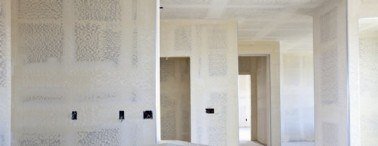
Taping and Mudding
In many quarters the art of putting drywall or joint compound on the wall is called “mudding.†The first thing to do before any drywall taping is done is to make sure all screw heads are slightly below the surface and that all corner beads have been installed.
These are metal protectors for the outside edges. With a 5†putty knife fill the joints with drywall compound and then place the tape over top, carefully pressing it into place. Run the knife with a small amount of mud over the tape and spread it evenly.
Do the same for the inside corners except crease the tape beforehand so it goes in square. The outside bead is raised so run the putty knife with mud down at a 45 degree angle. Have one side of the knife on the bead and the other side on the raised part of the sheetrock.
Now cover the screw heads with a skiff of mud. Leave this to dry overnight. With a sponge or block sander smooth out the joints being careful not to shred the tap. The next layer of mud should bring the joints up to the level of the drywall. Like any other skill drywall texture takes a lot of practice to get good. Start in the basement and work your way to the places where it will show.
This way you get on a good learning curve before drywalling where it counts. For a flawless drywall job it is best a few bids from professional sheetrock contractors. The drywall installation cost is worth it for a great job. Our Contractor Directory can show many qualified tradespeople but for faster action just post your project on trustedpros.ca.
Posted by: TrustedProsSuggested Reading For You
Drywalling Hanging Tips
Hanging drywall for contractors using right tools like a utility knife, screw gun, sanding pads and dr...