In “Add Extra Living Space to Your Home with a Stunning New Deck!†part 1, we discussed aspects of building a wood deck. This included purpose, wood deck design and deck plan, footings, support posts, box frame and ledger board, joists, and composite deck design.
In part 2 we will cover decking material, building deck stairs, deck railings, and extra features such as benches or planters, and stain and water seal finishes.
Installing the Deck Boards
When it comes to decking board lumber there are several choices, including 2X4 and 2X6. Also popular are 5/4 X6 and 5/4 X4 with rounded “bullnose†edges.
While redwood and cedar are attractive, as well as insect and weather resistant, pressure-treated lumber is also a good option. Another popular choice is re-cycled plastic fiber decking. Re-cycled plastic decking looks like wood, but is virtually impervious to weather and insects; it requires no wood deck stain or maintenance. Although this type material has adequate strength for decking, traditional lumber is required for the posts, box frame, and joists.
Whatever decking material you choose, there are several ways to secure it to the joists and box frame. Many DIY deck builders opt for traditional right angle installation; spanning the joists with decking boards running parallel to the house. However, this method of decking can allow the box frame to “rack†and move out of square; adding instability in the structure. This type problem can be offset by cross-bracing underneath the deck.
For a more decorative look, install the decking on a 45-degree angle to the joists and box frame. This will increase stability and minimize racking. This method requires a little extra skill and precision; to insure proper cutting and fit, made easier by using a power miter saw.
Decking boards should be fastened to joists with the best side up; boards do not require spacing unless they are “kiln dried†lumber or man-made material which will not shrink. If so, it should be spaced at about 1/8-inch intervals. All other deck lumber should be tight, to allow for shrinkage.
Fasten deck boards to joists with galvanized or stainless steel spiral or ring-shank nails, or deck screws. Two spaced at about ¾-inch from board edges on each joist is adequate, although some builders prefer three. Torx head deck screws are much less prone to stripping. Drill pilot holes in the deck board with a small bit before nailing or screwing to prevent board splits.
How to Build Deck Stairs
Building deck stairs from scratch can be a technical, time-consuming process. A stringer can be made using 2X12 redwood or pressure treated boards, notched to accommodate the step treads. The stringer should be sloped at an angle from the ground to the deck surface at 30 to 35-degrees.
The normal rise desirable on each step is 7-inches, with a step depth of 11-inches. Most local building codes require a minimum staircase width of at least 3-feet. However, code guidelines can vary, so check to see what the local guidelines are for your area.
If building your own deck steps sounds too technical, fear not! Pre-cut stringers can be purchased at most building supply outlets, and modified for your individual needs. In many cases, purchasing ready-made stringers is a more cost and time-effective option than trying to construct your own.
Attaching Stringers
Stringers are attached to the box frame of the deck with joist hangers. For added strength, 4X4 posts with footings at 4-foot intervals on each side of the staircase will serve double duty; bolt stringers to them for additional support. And then secure handrails to the top of them. Note: Be sure to trim posts to match the slope of the staircase. Plan carefully. Follow code requirements; handrails should be 30 to 36-inches above the stringer.
Treads are installed across the stringers on the notches, with or without 1-inch thick riser boards set on edge against the back of the notch; resting flush with top edge of the notch. 2X4 or 2X6 can be used for the treads, or whatever width works best. Avoid using boards with knots or cracks.
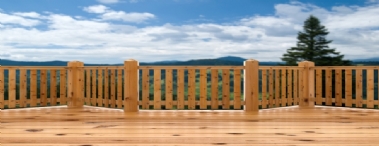
Deck Railing
Now it's time to install deck railing around the perimeter of the deck and on the staircases, for safety purposes. One option during initial deck planning is to leave deck support posts long enough to extend far enough above the deck surface, so that once the rail has been added local building requirements are met.
Add extra posts bolted to the box frame between the deck support posts so there are 4-foot intervals between each. 2x4 or 2x6s can be bolted, nailed or screwed to the supports. Place one on edge along the outside perimeter, flush with the top of the supports, and then another secured on top center for the cap rail. Fasten a 2x4 on edge to the front of the supports; make sure the bottom edge is flush with the deck surface.
The top and bottom perimeter boards will serve as rails to attach vertical pickets. Most local building codes require spacing of less than 4-inches between each. For a more decorative look, the front edges of pickets can be cut at an angle on each end.
Extra Features
Extra features such as a deck railing planter box or benches can be added at this time. Keep in mind that local building codes might specify seat height requirements.
If your deck idea includes a hot tub deck design or Jacuzzi, local building codes will have requirements for added support, electrical and slipping hazard factors, and accessibility to equipment features.
Up
Once construction is complete, your new deck must be stained or sealed. Wood deck stain and deck sealer options are available in countless colors and types, from numerous manufacturers.
Some types of products should be avoided as outdoor deck treatments because they do not stand up well to outside elements, and re-application can cause an ugly, stubborn build-up, difficult to remove. To ensure the product you select will yield desired results long-term, check consumer reviews on product use.
If you wish to maintain the beauty of redwood or cedar, use a high quality sealer such as Messmer's or ADM2000. While a quality sealer can last for 2 to 3 years, remember - periodic reapplication will be required to keep its attractive appearance.
A quality deck wash product used with pressure washing (3000 psi) is recommended to prepare for sealer reapplication. Be sure to allow ample time for drying after pressure washing.
Using a wood sealer will allow the natural beauty of the wood grain to show through. A deck stain, on the other hand, might yield a solid color, or prevent some or all of the wood grain from showing through.
Regardless whether you select a sealer or a stain, keep with the same product when it is time for reapplication. When applying deck stain or deck sealer, best results are accomplished by first rolling on a coat, and then brushing it out for uniform distribution.
For any phase of custom outdoor deck design, construction, or finishing, find reliable local experts to lend a helping hand at TrustedPros.ca
Local contractors in your community are on stand by; ready to help with any phase or all of a new deck building project. Post your project online absolutely free, with no obligation whatsoever. Receive competitive bids within days, even hours!
Posted by: TrustedProsSuggested Reading For You
Choosing the Perfect Deck and Fence Materials: A Comprehensive Guide
Determining the optimal materials for your decks and fences hinges on factors like durability, aesthetics&...
Building a wooden deck in the garden 101: design options, extensions, and craftsmanship
You may have your dream deck envisioned, but do you know if you can trust that a contractor will execute i...