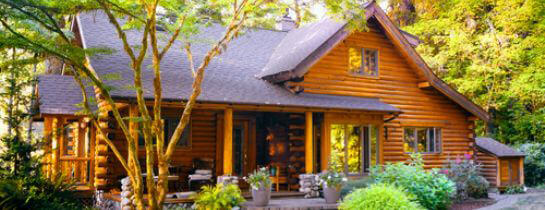
Renovation to enhance cottage design is pretty open. Key themes to incorporate are cozy, and quaint, with emphasis on country charm. So regardless if your cottage home is lived in year-round, or a summer cottage, cozy cottage getaway; keep cottage style open and friendly. Mix and mingle old with the new to tell a story, inviting and warm.
Country Cottage Design; a Marriage Between the Past and the Present
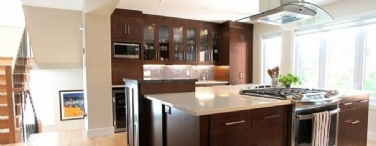
Cottage country design can blend the past and present for cozy cabin charm. Consider the following ways to exploit an existing wall to find solutions for small kitchen space:
- A two-legged table on hinges that folds down from the wall makes a perfect small space kitchen table. Or use it as extra table space to arrange platters of food served buffet style when entertaining. Two or three outlets, hidden from view when the table is up, provide electrical sources for heated trays, crock pots, and anything else that requires electricity.
- A compact microwave oven can be installed into a cubby hole in the wall; make sure there is adequate ventilation. Add wood shutters on either side to hide the microwave when not in use.
- A distressed floor wood complimented by a braided country rug provides classic cottage appeal. The modern addition of a heated floor element underneath keeps feet comfy cozy during winter months.
- Another small space idea while keeping the cottage design theme of mixing old with new? Open the ceiling to the underside of the rafters, and add skylights. A stenciled ivy pattern weaving up along the wall to the skylights will soften the effect.
Enhance Cottage Decor with Box Light Fixtures
Use box light to enhance aspects of cottage home design without taking up valuable headroom or floor area.
Even if you plan on handling other aspects of cottage interior renovation yourself, you might want to hire a specialty contractor for this type job. An experienced electric contractor will not only be familiar with building code requirements. They can create custom boxes using distressed finish wood to complement cottage design.
Box Light Basics
Part of building box light fixtures is determining the right combination of molding and spacer pieces. The molding must project far enough from the side of the box to hide the light fixture, yet allow enough space to change the bulb when needed.
Use a fluorescent bulb for box light. Fluorescent light lasts longer than incandescent, uses less electricity, and throws less heat. Include a new technology fluorescent light dimmer for subdued or bright light.
Paint the boxes using semi-gloss latex paint in a light color; line the inside surfaces of each piece of molding with reflective foil duct tape.
Home Renovation Tip; How to Remove an Interior Plaster Wall
Many older cottages have plaster walls. Replacing an interior plaster wall is a messy, dusty job. Always wear eye protection and a dust mask during the demolition process; use sheets of plastic to protect furniture and block open doorways.
If the plaster you want to remove covers most of the wall surface, consider removing the whole surface of that wall. It is easier to replace an entire wall with wallboard than patching around a project area, and results look better.
After marking the plaster wall to be removed, apply a double layer of masking tape along the outside edge of the cutting line. Use a utility knife to score the cutting line several times. Use a straightedge as a guide; make incisions at least 1/8-inch deep.
Begin at the top of the wall in the planned center of the opening, and break up the plaster by striking the wall lightly with the side of a hammer. Continue breaking up and removing the plaster to within 3-inches of the cutting lines.
Break the plaster along the edge of the cutting line by holding a scrap piece of 2†X 4†lumber just inside the scored lines. Rap it with the hammer; use a pry bar to carefully remove remaining plaster.
Removing the Lath
If there is metal lath over the wood lath, you must first use aviation snips to clip the metal lath edges. Press jagged edges of the lath flat against the studs. Be sure to wear heavy work gloves to avoid injury.
Use a reciprocating or jig saw to cut through the lath along the edges of the plaster, and a pry bar to remove the lath from the studs. Remove any remaining nails, vapor barrier, and insulation.
Your best resource for renovation success and small space solution ideas that enhance cottage life is a renovation contractor. One with experience in cottage interior renovation.
TrustedPros.ca is the best renovation contractor matching service available anywhere. Project owners can post projects online for free, using fast and easy tools that make posting a breeze!
Posted by: TrustedProsSuggested Reading For You

Top 10 Spring Renovation Trends for 2024
As days grow longer and temperatures begin to rise, spring emerges as an opportune season to breathe new l...
From Aspiring Handyman to Master Builder - Building Your Path to General Contractor Success!
If you have a passion for construction and project management, becoming a general contractor can be a rewa...