Asphalt driveways tend to be durable, but only to a point. Weather, use and improper maintenance take their toll on this product and sooner or later repairs will be necessary. Tackle asphalt driveway repairs yourself with convenient products and a little know how.
Tips on Asphalt Driveway Repair
1) The Size of the Crack or Hole Determines A Lot
When repairing a split or crack in your asphalt driveway, it's important to get the right product. And that will depend on the width of the crack or hole you need to fill.
For cracks under 1/2†wide pick up some crack-filler, an easy to use product applied with a caulking gun. If the gap is over 1/2" wide, opt for asphalt cold patch products that will create a more solid surface. You should also fill deep cracks with sand and large holes with gravel for a better repair.
2) Clean It Up
The first step to repairing or sealing your driveway is to sweep it clean. Remove any loose bits of gravel and asphalt, even if it means you'll make a larger crack or hole. It's best to have those weak sections completely removed before the patching or filling is attempted. Spraying with a hose or lightly power washing will help to get rid of any loose bits a broom might miss.
Also remove any weeds that have made their way stubbornly through the cracks. Pull them and then use weed killer to make sure they won't return.
3) Weather Dictates
For asphalt repair you will need a full day of hot, dry weather, especially when working with the cold patch. Sealing is best done before any rainfall and when the temperature is warm enough for a good bond to form.
If you notice cracks or holes in the winter, it's best to wait until the warmer days of spring to tackle this project.
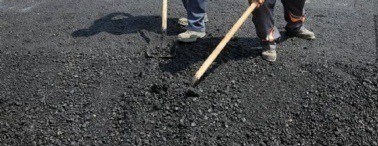
4) Don't Forget to Tamp
During the filling process you should be tamping down the asphalt patch twice - once when you've filled the hole or crack almost to the top and the second time after you filled to slightly over the rim. This tamping process will eliminate air holes and uses pressure to help to make a better bound.
Use a tamping tool or simply the end of a 4x4 for a quick, decent job. For larger holes you can even roll your car on top of the repair (after lightly covering it with sand to prevent sticking).
5) Always Seal Afterward
With crack repairs or hole patching you'll need to apply seal afterward to keep moisture out and ensure the best bond between the existing asphalt and the new product. You don't necessarily need to seal or reseal the entire driveway, but that may not be a bad idea if it hasn't been done recently.
Use a good quality sealer and apply two coats for a thick, truly protective finish.
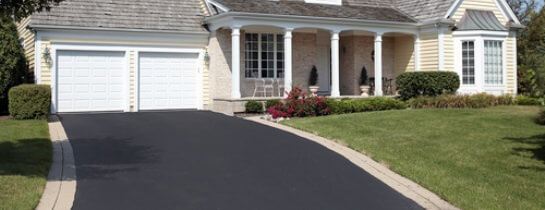
Your driveway will be completely repaired and looking good as new thanks to your DIY asphalt driveway repair techniques. Moisture will eventually return and more cracks and holes may appear. But with these straightforward tips and some practice you should be able to handle that as well.
Posted by: TrustedProsSuggested Reading For You

Paving Contractors
Paving contractors use a spreading machine with hot mix asphalt pavement for asphalt driveways. Driveways cont...
Preparation is the Key - Install Asphalt Paving That will Last
Asphalt paving is cost-effective and durable. This article gives helpful tips for proper road bed preparation ...