Having to deal with roof concerns is a certainty for nearly every homeowner at one time or another. However, many untimely roofing problems can be avoided by annual inspection for possible repair needs. Or else including a new roof when undertaking a home improvement construction project.
With the exception of a few new rubber roofing products and the new innovation of metal roof tile and metal shingles, roof material and roof installation techniques have remained pretty much the same for the last 20 or 30 years; with the exception of cost, of course, due to inflation.
Shingle Types
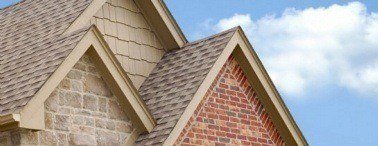
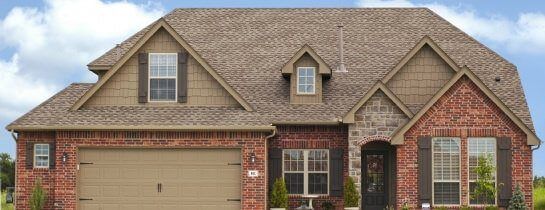
Largely due to the cost factor, an asphalt shingle roof is by far the most common and popular type of roofing installed today. Asphalt roof shingles are available in over 50 colors and about 12 different styles; ranging from the common 3-tab shingle, to architectural shingles, to T-lock shingles. Asphalt shingle life expectancy is about 15-years.
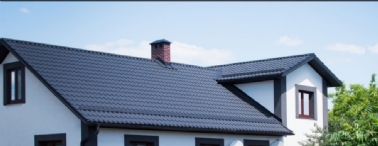
The next most popular roof type is metal roofing; gaining popularity due to the fact that when properly maintained, quality metal roofing will last 50 to 100 years or more. In areas with heavy annual snow accumulation, this type roofing is especially popular because of its snow shedding characteristics; reducing the danger of roof collapse under crushing snow loads. Note: metal roof tile and metal shingles have not been in use long enough to accurately determine life expectancy.
Cedar shingles or a cedar shake roof remains the choice for many homeowners. Mainly because of its visual aesthetic appearance and life expectancy, which can be 50 to 100-years when properly maintained.
Other very desirable roof types include ceramic roof tile, concrete roof tile, and slate roof tile. Roofs made from these materials have an extremely long life span when properly maintained; up to hundreds of years. They have been the roof of choice for the wealthy elite not only because of life span, but the unrivaled attractiveness added to the structure.
There are several other roof material choices in use, especially for flat roof structures with only a slight or no roof pitch. Built-up roofing (BUR), also known as a hot asphalt roof, uses multiple layers of membrane fused with hot-mop asphalt.
Modified asphalt (available in rolls) is heated using a torch as it is rolled out. When correctly installed, some asphalt will seep from under seams; an indication of an adequate seal. EPDM rubber membrane roofing forms a single rubber membrane; this roof type is installed using a “cold†process not requiring hot asphalt or torching.
About Pricing
Regardless what type roofing is installed, it is usually priced by the “square;†a 10 X 10-foot area totaling 100-square feet. . Tearing off the old roof and hauling it away costs an additional $50 to $150 per square.
Asphalt shingles are the most affordable type of roofing; $200 to $300 per square installed. Cedar shingles or cedar shakes are about $350 to $400 per square installed.
Metal roofing price is higher than shingles, but usually lower than ceramic tile, concrete tile, or a slate roof. Prices for material alone without installation ranges from $200 per square for standard metal, to over $600 per square for quality coated steel (which lasts 50 to 100-years.) Costs for metal roof options vary greatly depending on installation difficulty; roof designs with multiple gables and valleys will add to the cost.
Ceramic roof tile, concrete roof tile, and slate are the most expensive options; usually over $1,000 per square installed. These types of roof tile add considerable weight to the roof; as much as ½ ton per square. Requiring strong roof trusses to bear the extra weight. Retrofitting your roof with heavier trusses to support roof tile requires major roof construction; with cost significantly higher than $1,000 per square.
Roofing as a DIY Project
Some homeowners may possess the skill to undertake the do it yourself roofing project of installing asphalt shingles. Before starting, however, preparatory work is required.
A new layer of shingles can sometimes be installed over the old, but never for a total of more than 3 layers. If tearing off old shingles, remove all shingles, nails, and felt. Inspect the decking, which usually consists of 7/16 inch OSB or ½-inch exterior grade plywood. If there are areas of deteriorated decking, they must be replaced. Use 16p nails to attach decking to roof trusses; one nail every 8-inches.
In extreme cases, the entire decking must be replaced. Oftentimes, the only prep work required after the old roof is removed and before new shingles are installed, is to make sure all old nails or staples have been removed, for a smooth surface. And then stapling new 15 lb. or 30 lb. roofing felt to the decking.
This is done in runs starting at the bottom: new runs should overlap the top edge of the previous run by about 3-inches. After the felt is in place, galvanized edge flashing is nailed along the perimeter of the roof. Shingles are nailed or stapled in “runs†beginning at the bottom edge of a roof, working toward the peak.
After the first run of shingles is in place, each subsequent run should be spaced evenly so that seams in the tabs are evenly offset with the previous run; promoting maximum water shed. It may be necessary to snap a horizontal chalk line every few runs to keep them on a straight line.
To properly do valleys, a 16-inch wide piece of valley tin must be nailed vertically into the center of the valley. And then a run of shingles with no overlap should be installed vertically over the tin. If the two sections of roof that meet in the valley are the same height, runs of shingles can be over lapped just beyond the valley from either direction; complete one section first, before beginning the next.
When starting the second area, trim the runs in a straight edge in the center of the valley. If one section is lower than the other, runs on that section should always be done first, running slightly past the valley. When runs are installed on the higher side, they should be trimmed to form an edge in the center of the valley.
For the ridge cap, trim 3-tab shingles vertically, making 3 separate tabs. Start at the end of the ridge that is opposite to the direction from which prevailing winds blow, with the bottom of the tab closest to the end of the ridge. Fold the shingle centered evenly over the ridge and nail into place. Proceed accordingly up the entire length of the ridge, lining up each tab as you would for a run of shingles.
Nail in place so that the overlap covers previous nails, and lines up for a good seal on the asphalt sticky tabs. When you get to the end, trim the nailing part of each tab off. Complete the task by placing a nail on each corner, covering the nailing part of the previous tab.
Outside temperature when installing shingles should always be at least 40ºF or higher. This insures that enough heat will be generated on the roof to seal the asphalt sticky tabs, ensuring that shingles will not become damaged or torn off during windstorms.
Most shingles are warranted against wind damage for winds up to 60mph. However, installing shingles during low temperatures may void this warranty. By the same token, shingles should not be installed during too high temperatures. Excessive heat causes shingles to be too soft and susceptible to damage from persons moving on the roof. The ideal installation temperature range is between 50º and 60ºF.
Locate Reliable Contractors - Quickly and Easily
If this sounds too technical, or if a homeowner is planning a different type roofing material installation, acquiring the services of a professional roof contractor might be best.
Locate a metal roofing contractor for a home renovation or a local flat roofer for a roof repair job quickly and easily at TrustedPros.ca. Canada's top online matchmaking service; connecting project owners to reliable service providers who can get the job done right - at the right price!
Homeowners sign up FREE without obligation, and post their roof installation project online, where it is immediately visible to roofing professionals in their community, 24/7. Local contractor members also receive e-mail notification of new project listings within their scope of expertise, and provide competitive bids in days, even hours after project posting.
Evaluate each candidate's portfolio online at TrustedPros.ca; including company profile, references, licensing/insurance/certification information, and photos of recently completed projects. And then make an informed hiring decision, or hire no one at all. Remember, there is no obligation whatsoever.
Posted by: TrustedProsSuggested Reading For You
Top Choices for the Most Durable Roofing Material
The roof is the unheralded guardian of the home, bravely weathering the elements, giving us the peace ...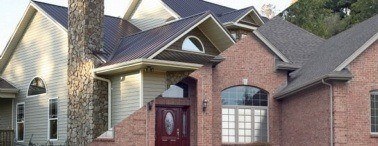
Asphalt vs Metal Roofing
Arguably the most important surface in your entire home, a roof endures the most direct weather exposure a...