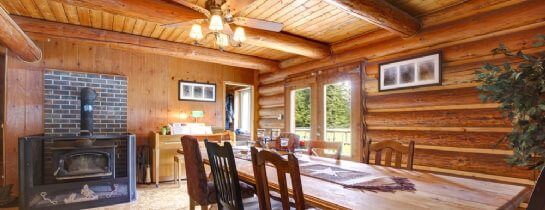
Wood paneling is an excellent alternative to drywall, plaster or other wall finishes. It's also an ideal DIY project. Less fussy to work with than finished carpentry, paneling does require a steady hand, accurate measurements and a good set of tools. It's a good idea to have a helper with you, even if just to hold the typical 4x8 panels in place.
Essential Tips for DIY Wood Paneling Installation
1) Measure Twice
Especially if you are working with expensive, custom or heavy paneling, make doubly sure that your measurements are correct. Measure the length of the wall, the height of the wall and any windows and door sizes that are applicable. Don't worry about electrical boxes or other small details during the measurement stage.
2) Conditioning is Important
This is important and when you're in a hurry, very tempting to skip. But conditioning the wood will provide you with the best possible finish, result in less cracking, splitting and other unsightly mars in your panels. It's best to stand each panel up individually along the wall. Stacking them on the floor will work if you have spacers that allow for enough air flow. Leave the panels to condition for about 48 hours.
3) Create an Even, Flat Surface
If you are installing the wood paneling straight onto wall studs, this may not be an issue. Wood paneling can be installed over top of drywall, plywood and even masonry. The most important factor is the flatness of the surface. If you need to repair, reattach or replace sections of drywall or other solid backing materials, do so before you begin the DIY wood paneling project.
4) Furring Strips
To provide a consistently solid backing for your wood paneling, install 1x3 furring strips at 16†centers, running either vertically or horizontally depending on the way the paneling will run. Use shims or wood shingles to make the strips as level as possible and masonry anchors or glue to attach the strips.
5) Be Careful With the First Panel
Start by laying out the panels to achieve the right grain pattern. Once you are happy with that, the cutting and attaching will begin with the panel set against the first corner that you seen when you enter the room. Make sure it is completely plumb and that the outer edge lands in the middle of a furring strip.
6) Cut Properly
Always use a fine-toothed saw for wood paneling, not a coarse-tooth type. Cut the tops 1/4" below the ceiling height. When using a table saw or a hand cross cutting saw, cut from the front of the panel (finished side). If you are using a circular saw or a saber saw, cut from the back.
7) Leave an Expansion Gap
Make sure to leave a gap between each panel about the size of a dime. This will allow for some expansion and contraction without altering the look of the paneling in any noticeable way.
8) Use the Recommended Attachment Method
If the manufacturers recommend nailing, be sure to use the stated size of nail, as well as any other relevant specifications. If adhesive is better, be sure to get a product that is made for use with wood siding. Once you have the panels up and have installed the trim, your beautiful room will be ready to live in. This DIY wood paneling project will take some time, but with accurate measurements and careful work, it will turn out perfectly.
Oh, and feel free to ask anyquestions you have. You can ask them in your comments, or post them to TrustedPros Forum to get answers from professionals.
Posted by: TrustedProsSuggested Reading For You

The War of the Walls
Walls, they're everywhere. We walk and drive past them. We live in between them. We hang pictures and ...
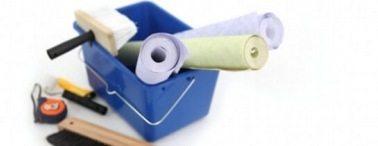
Wallpaper Yesterday and Today - Common Problems and Solutions
Information on the history and new innovations in wallpaper. Included are common problems with wallpaper prepa...